While this section focuses on the details of using Proxmox as a hypervisor to install EVE-NG, I will cover VMware ESXi 8 in a separate lab. I covered ESXi 6.5 but not since the Broadcom acquisition of VMware.
The free community edition EVE-NG ISO image is used for this lab. Also deploying the BIGIP F5 Local Traffic Management (LTM) appliance is used in this network topology. The installation of both Proxmox and EVE-NG can be found at Proxmox EVE-NG installation.
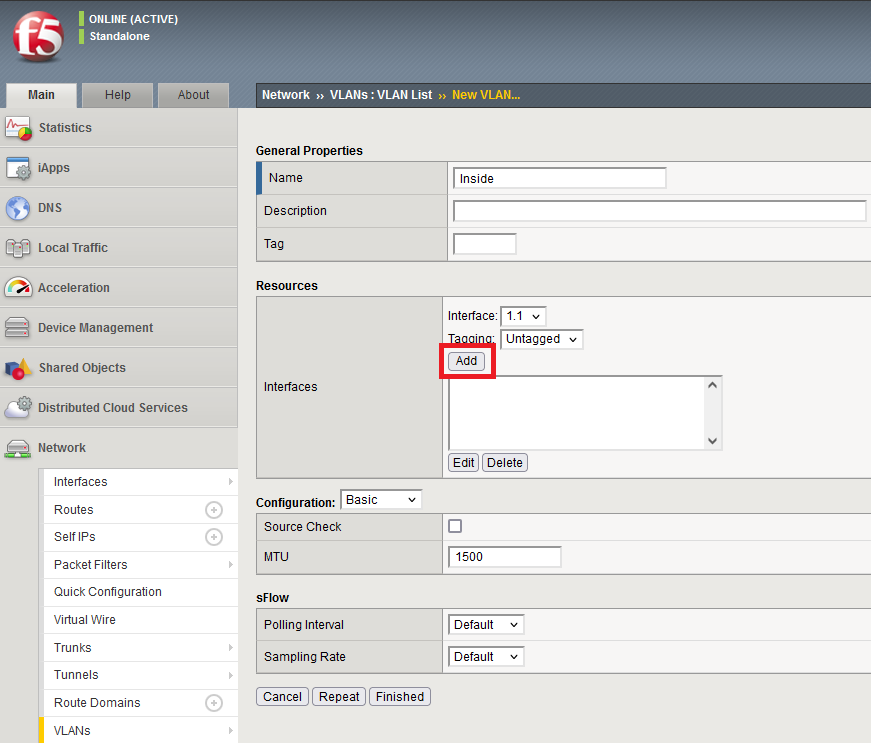
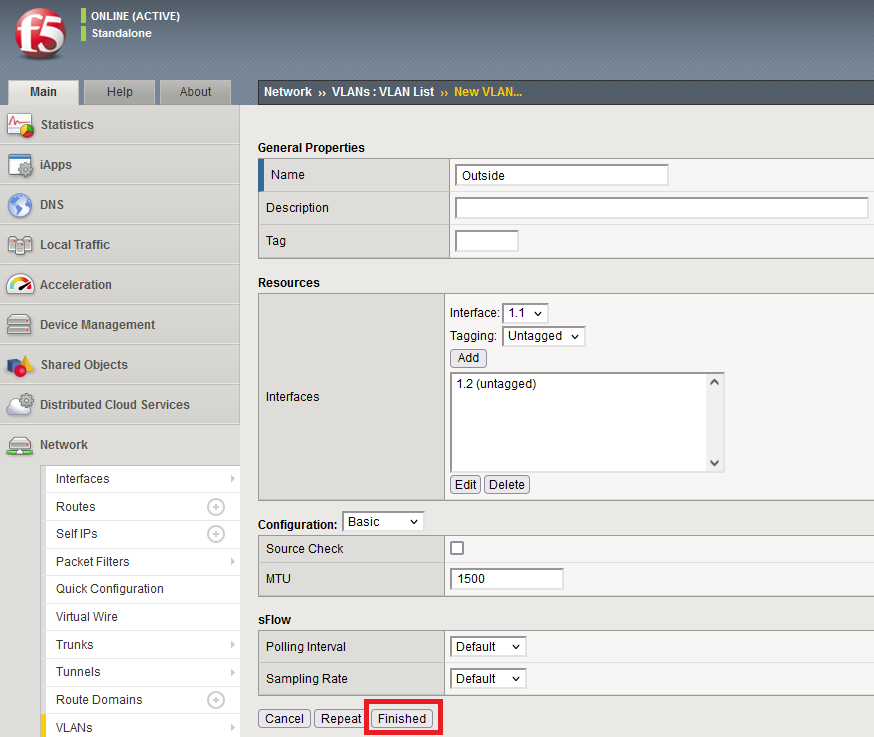
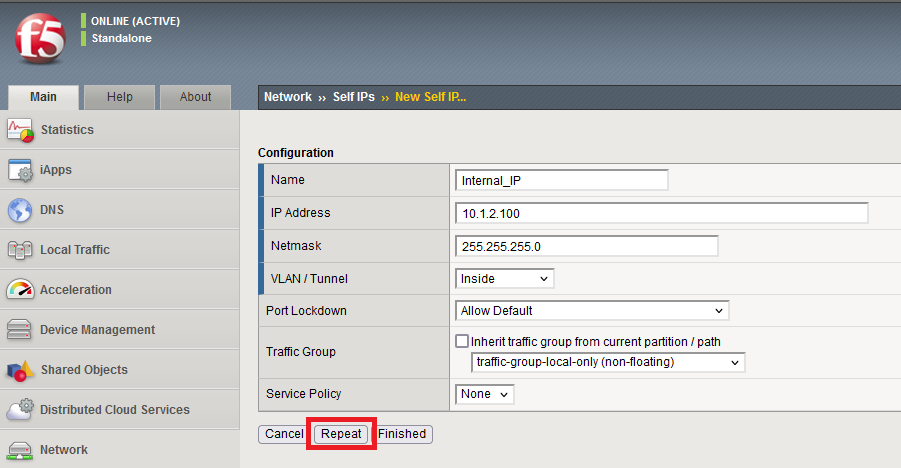
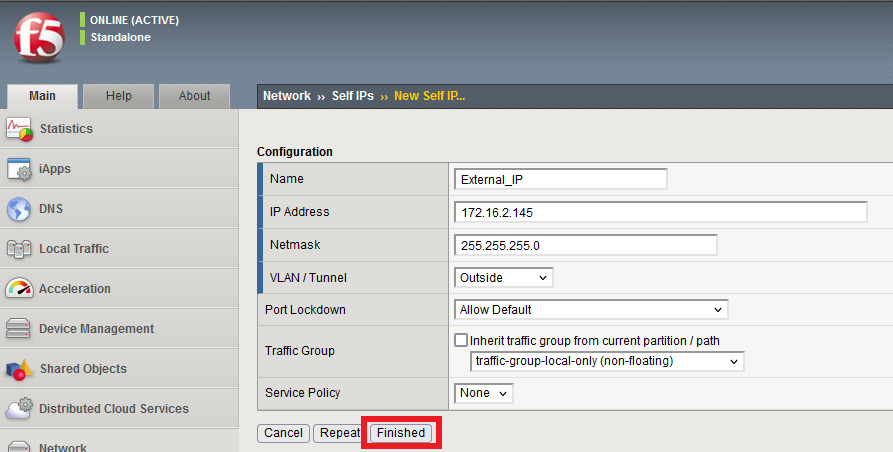
Now we are ready to create a VIP to access the BIGIP F5 LTM appliance. The topology is as follows:
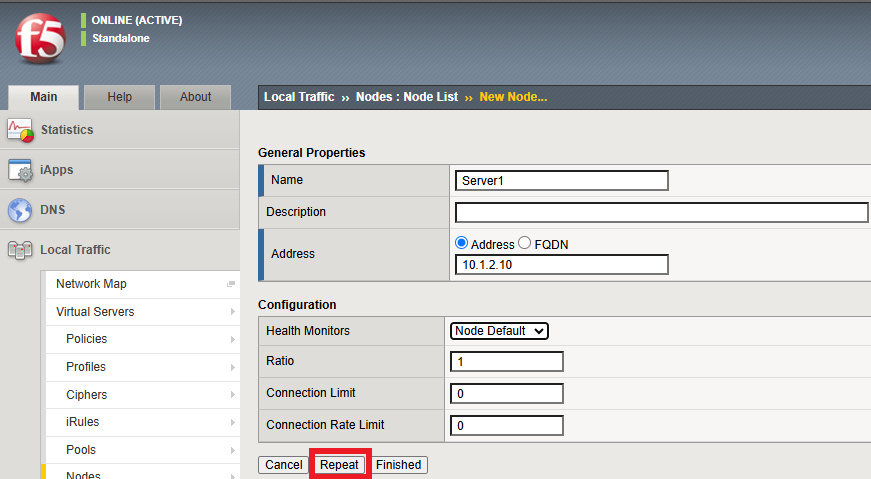
We will start with the nodes. 1) Local traffic > Nodes > Create
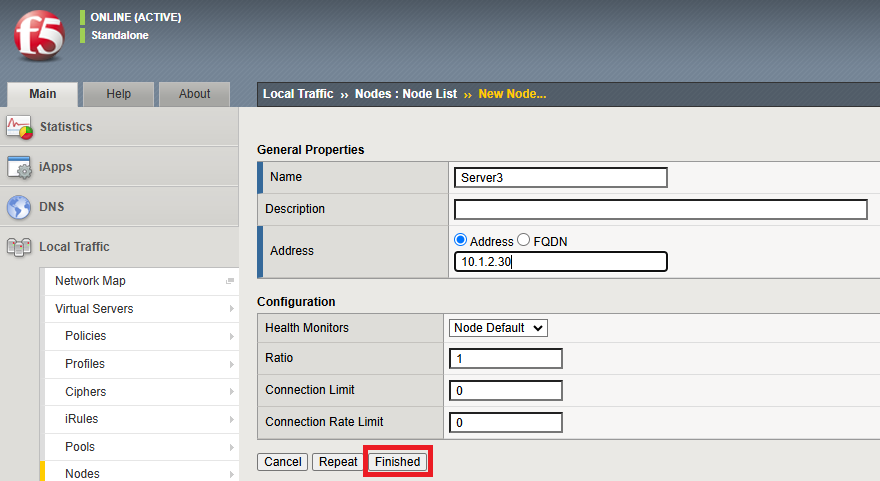
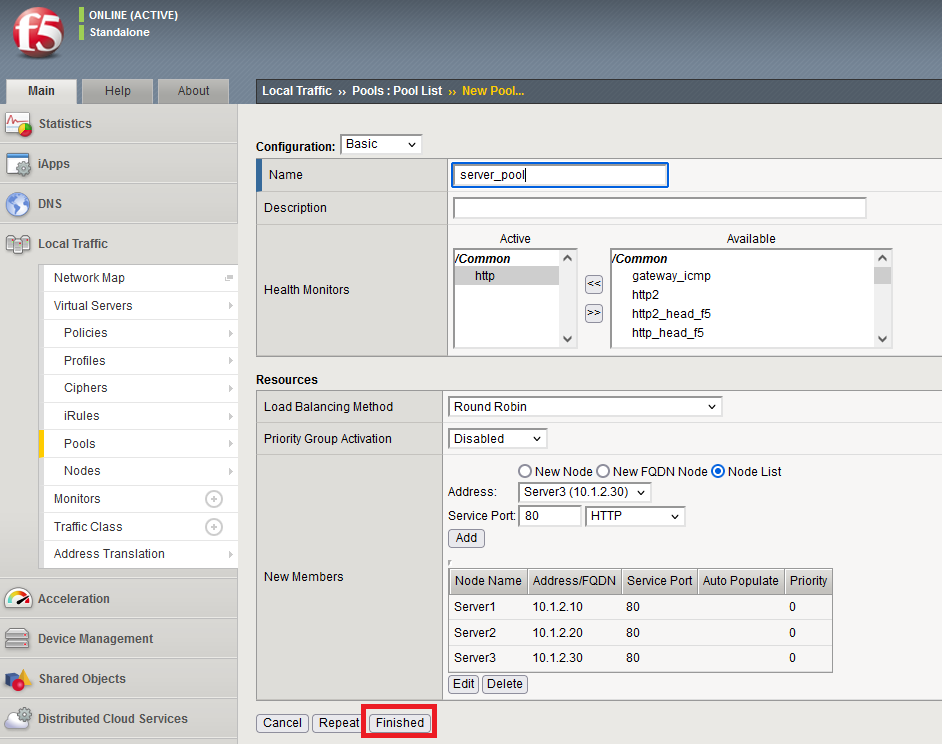
Repeat > Server2 Repeat > Server3 Then instead of repeating again, select Finished.
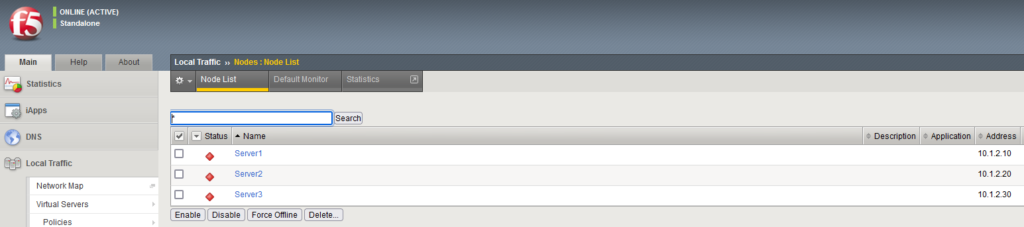
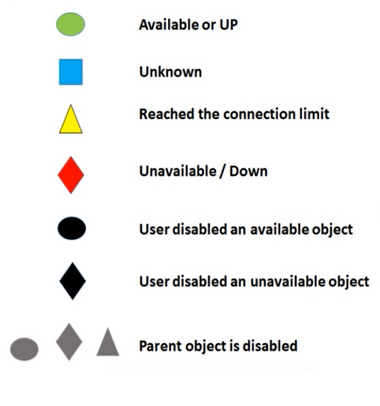
2) With these 3 nodes, the Node List is follows. The node colors are red indicates they are unavailable/down. They turn green once online available/up.
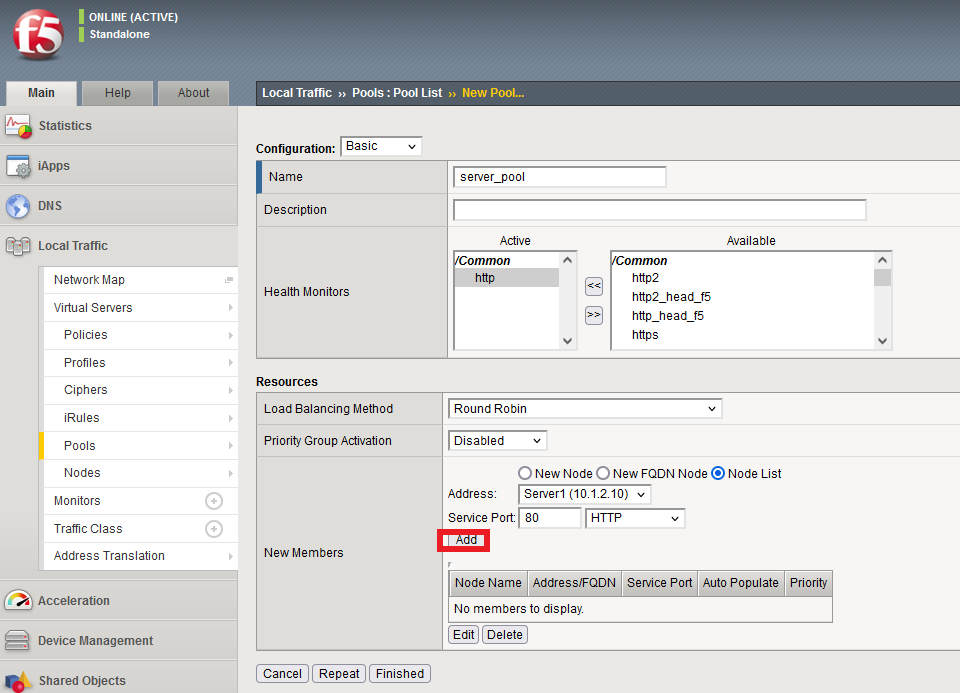
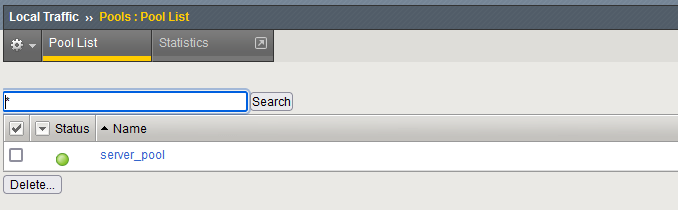
5) Created Pool | Local Traffic > Pools > Pool List > Create
– Add 1st node from drop down (from Node List) – Add 2nd node from drop down (repeat) – Add 3rd node from drop down (repeat) – Do not repeat, just finish once done!
5a) Pools -> Pool List > server_pool > /Common/http (update) **
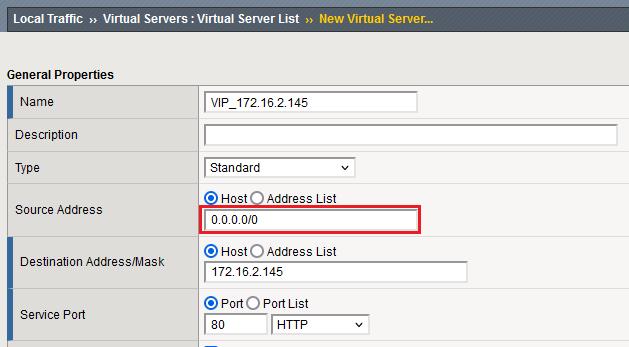
Create VIP | Virtual Server > Create
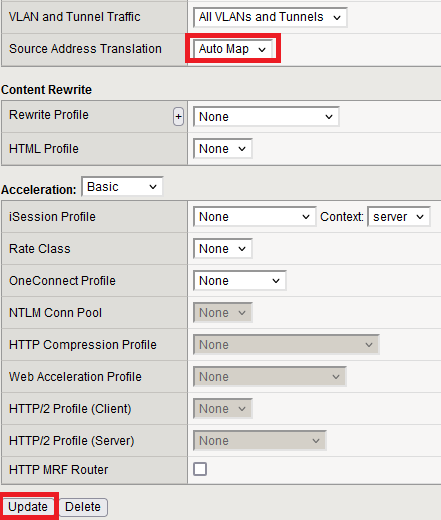
From the Default Pool drop down, select sever_pool and update…the VIP status will go green.
Now, on the remote client machine, open browser with VIP IP address http://172.16.2.145. – Duplicate tab twice – Refresh second tab (press F5) – Refresh third tab (press F5) Now watch how each subsequent server is hit.
Now from > Node > Local Traffic, the round-robin node statistics can be viewed: